Welcome! This guide unlocks your Canon Rebel T7/2000D’s potential, offering a comprehensive journey through its features;
Discover cinematic video and photography tips, mastering settings for a superior experience.
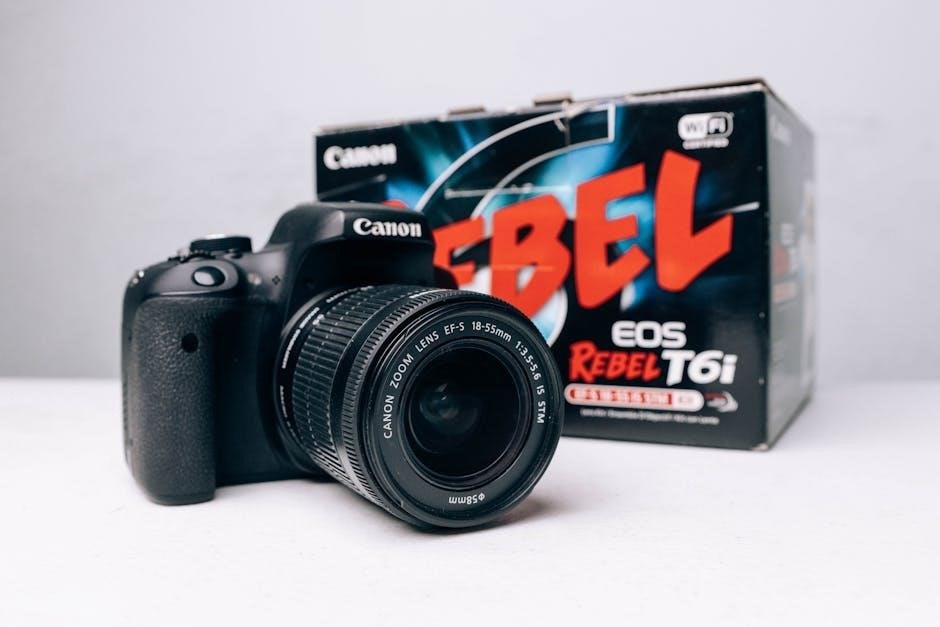
What’s in the Box
Unboxing your Canon Rebel T7/2000D reveals the camera body itself, a comfortable neck strap for secure handling, and a crucial battery to power your photographic adventures. You’ll also find a battery charger to keep you shooting, and an essential AC power cable.
Don’t forget the comprehensive instruction manual – your gateway to mastering all features!
Camera Overview: Buttons and Dials
Familiarize yourself with the Rebel T7’s layout! The power button initiates operation, while the mode dial selects shooting modes – Auto, Scene, or Manual. The shutter button captures images, and the directional pad navigates menus.
Essential dials control image zoom and settings adjustments. Understanding these controls unlocks effortless operation and creative control.
Setting Up Your Camera
Begin your photographic journey! Properly inserting the battery and SD card is crucial. Secure the strap for safe handling, and configure initial settings like date and time.
Inserting the Battery and SD Card
Powering up is simple! Locate the battery compartment door, usually on the camera’s bottom. Insert the Canon battery pack, ensuring it clicks securely into place. Next, find the SD card slot, and gently insert a compatible SD card until it locks.
Confirm proper insertion before powering on. Always use Canon-approved batteries and SD cards for optimal performance and to avoid potential damage to your Rebel T7/2000D.
Attaching the Strap
Secure your camera! Locate the strap attachment points – typically metal loops on either side of the camera body. Thread the strap ends through these loops. Ensure a secure connection by fully tightening the strap buckles or sliding the keepers into place.
Always keep the camera secured with the strap to prevent accidental drops and damage. Regularly check the strap’s attachment for wear and tear.
Initial Camera Settings (Date, Time, Language)
Personalize your camera! Upon first use, set the correct date and time within the camera’s menu. Accurate time-stamping ensures proper organization of your photos and videos. Navigate to the settings menu to select your preferred language for a user-friendly experience.
These initial settings are crucial for proper camera operation and file management. Confirm these settings are correct before your first shoot.

Understanding Shooting Modes
Explore creative control! The Canon Rebel T7 offers Auto, Scene, and Creative Auto modes, catering to beginners and experienced photographers alike. Unlock your vision!
Auto Mode (For Beginners)
Effortless photography begins here! Auto mode simplifies capturing stunning images. The camera intelligently selects optimal settings for exposure, focus, and white balance.
It’s perfect for quick snapshots and those new to DSLR photography. Simply point, shoot, and let the Rebel T7 handle the technical details, ensuring consistently good results.
Focus on composition and enjoy the moment, knowing your camera is working for you!
Scene Modes (Portrait, Landscape, Sports, etc.)
Unlock creative control with Scene Modes! These pre-set options optimize camera settings for specific shooting situations. Portrait mode blurs backgrounds, while Landscape enhances scenery.
Sports mode freezes action, and Night mode captures low-light scenes. Experiment with these modes to achieve professional-looking results without manual adjustments. They’re a fantastic stepping stone towards mastering your camera!
Creative Auto Mode
Explore artistic expression with Creative Auto! This mode offers a balance between automatic convenience and creative control. Select desired effects – like soft focus or vivid color – and the camera adjusts settings accordingly. It’s perfect for experimenting with different looks without diving into complex manual adjustments. Enjoy enhanced photos with minimal effort!

Focusing and Image Quality
Achieve sharp images! Explore autofocus modes like One-Shot and AI Servo. Select focus points precisely, and choose between RAW and JPEG for optimal image quality.
Autofocus Modes (One-Shot, AI Servo)
One-Shot AF is ideal for stationary subjects; it focuses when you half-press the shutter button. AI Servo AF excels with moving subjects, continuously tracking focus as they move.
Selecting the correct mode ensures sharp results. Experiment with both to understand their strengths. Remember to confirm focus before fully pressing the shutter!
Focus Points Selection
Nine autofocus points offer precise control over where your camera focuses. You can select a single point for accuracy, or allow the camera to automatically choose one. Experiment with different point selections to master focusing on specific areas within the frame. This impacts sharpness and creative control!
Image Quality Settings (RAW vs. JPEG)
Choose wisely! JPEG files are smaller, ready to share, but offer limited editing flexibility. RAW files capture all sensor data, providing maximum editing control for professional results. RAW files are larger and require post-processing. Consider your workflow and desired level of image manipulation when selecting your format.

Video Recording
Capture life’s moments! Explore resolution and frame rate options for cinematic videos. Utilize the microphone input for enhanced audio quality during recording.
Video Resolution and Frame Rates
Unlock video creativity! The Canon Rebel T7/2000D supports Full HD (1920×1080) video recording, delivering sharp and detailed footage. Frame rates include 24fps for a cinematic look, 30fps for standard video, and 60fps for slow-motion effects.
Experiment with different settings to achieve your desired aesthetic. Higher frame rates require more storage space, so consider your SD card capacity. Understanding these options is key to professional-looking videos.
Microphone Input and Audio Settings
Enhance your videos with superior sound! The Canon Rebel T7/2000D features a 3.5mm microphone input, allowing connection of an external microphone for improved audio quality. Navigate the menu to adjust audio levels and select recording modes – auto or manual.
Monitoring audio during recording is crucial. Ensure proper levels to avoid distortion or excessively quiet sound. Experiment with microphone placement for optimal results, capturing clear and immersive audio.
Starting and Stopping Video Recording
Initiate video capture with a simple press of the dedicated movie record button! Located on the top panel, this button instantly switches the camera to video mode. Press again to halt recording. The LCD screen displays recording time remaining and essential settings.
Half-pressing the shutter button won’t start video; use the dedicated button. Review footage immediately after recording to confirm quality and framing. Practice these steps for smooth, efficient operation.
Navigating the Menu System
Explore customizable options! The menu, accessed via the MENU button, organizes settings into intuitive categories. Master this system for personalized control and optimal performance.
Customizing Menu Options
Personalize your experience! The Canon Rebel T7/2000D allows extensive menu customization. You can rearrange menu items for quicker access to frequently used settings. This includes tailoring options for shooting, autofocus, image quality, and playback.
Explore the “Menu” button to dive into these settings. Remember to save your preferences for consistent operation. Download the PDF manual from Canon’s website for detailed guidance on each option, ensuring a workflow perfectly suited to your needs.
Understanding Menu Categories
Navigate with ease! The Canon Rebel T7/2000D’s menu is logically organized into categories. These include Shooting, AF (Autofocus), Quality, Setup, and more. Each category contains related settings for streamlined adjustments.
The instruction manual (available as a PDF) details each category’s function. Familiarize yourself with this structure to quickly locate and modify settings. Canon’s website (www.canon.com/icpd) provides access to these valuable resources.

Using the Built-in Flash
Illuminate your shots! Explore flash modes – Auto, Manual, and Red-Eye Reduction. Adjust flash exposure compensation for perfectly lit images, enhancing your photography.
Flash Modes (Auto, Manual, Red-Eye Reduction)
Auto mode intelligently determines when flash is needed, simplifying shooting in varied lighting. Manual mode grants full control over flash power, ideal for creative effects and precise exposure.
Red-Eye Reduction emits pre-flashes to minimize the red-eye effect in portraits, ensuring natural-looking results. Experiment with each mode to discover optimal settings for diverse photographic scenarios, enhancing image quality and artistic expression.
Flash Exposure Compensation
Flash Exposure Compensation allows fine-tuning of flash intensity, overriding the camera’s automatic settings. Positive values brighten the flash output, useful for backlit scenes, while negative values reduce it for overpowering subjects. This control is crucial for achieving balanced exposures, preventing washed-out highlights or overly dark shadows, and ensuring consistently well-lit photographs.
Connecting to a Computer and Transferring Photos
Transfer your memories! Easily connect via USB cable or utilize Wi-Fi for wireless photo transfer to your computer. Download Canon’s software for streamlined organization.
Using a USB Cable
Direct Connection: To connect, power off your Canon Rebel T7/2000D. Use a standard USB cable to link the camera to a computer port. Power on the camera; a connection prompt will appear. Select ‘Send images to computer’ on the camera’s LCD screen.
Your computer will recognize the camera as a storage device. You can then browse the DCIM folder to copy your photos and videos. Ensure proper ejection before disconnecting the cable.
Wireless Transfer (Wi-Fi)
Easy Sharing: Enable Wi-Fi on your Canon Rebel T7/2000D via the menu. Select your network and enter the password. Download the ‘Canon Camera Connect’ app on your smartphone or tablet. Launch the app and follow the on-screen instructions to pair your camera.
Once connected, you can browse, download, and share images wirelessly. This method offers convenient photo transfer without needing cables, simplifying your workflow.

Troubleshooting Common Issues
Quick Solutions: Addressing typical problems like power failures or error messages is crucial. This section provides straightforward fixes to get you back to shooting quickly.
Camera Not Turning On
Initial Checks: First, ensure the battery is correctly inserted and fully charged. Try a different, known-good battery if possible. Verify the battery compartment latch is securely closed.
If the issue persists, inspect the SD card; sometimes, a faulty card can prevent startup. Finally, double-check the power switch position – it must be fully engaged!
Error Messages on the LCD Screen
Decoding Errors: When an error message appears, immediately note the exact wording and error code displayed. Consult the camera’s full instruction manual (available as a PDF online) for specific troubleshooting steps related to that code. Common issues include card errors, lens communication problems, or internal camera errors requiring service.

Advanced Features
Explore creativity! Master Picture Styles and White Balance settings for personalized image control. Unlock your Canon Rebel T7’s full artistic potential.
Picture Styles
Customize your images! Canon’s Picture Styles offer pre-set image processing for various scenes. Choose from Standard, Portrait, Landscape, Neutral, Faithful, and Monochrome.
Each style adjusts sharpness, contrast, color saturation, and tone. You can also create and save custom Picture Styles, tailoring them to your unique photographic vision. Experiment to achieve desired results!
White Balance Settings
Achieve accurate colors! White Balance adjusts colors so whites appear white, correcting color casts from different light sources. Options include Auto, Daylight, Cloudy, Tungsten, Fluorescent, and Flash.
Custom white balance allows precise adjustment using a white or gray card. Incorrect white balance results in unnatural colors; mastering this setting is crucial for professional-looking photos.

Cleaning and Maintenance
Protect your investment! Regularly clean the sensor and lens with appropriate tools. Gentle care ensures optimal performance and extends the lifespan of your Canon Rebel T7/2000D.
Cleaning the Sensor
Dust is the enemy! The camera’s image sensor is delicate and attracts dust. Canon recommends using a blower to remove particles first. If needed, utilize a sensor cleaning kit – swabs and fluid – with extreme caution.
Follow the camera’s menu instructions for sensor cleaning mode. Improper cleaning can damage the sensor, so consider professional cleaning if you’re uncomfortable. Regular checks and gentle cleaning maintain image quality.
Caring for the Lens
Protect your investment! Always use a lens cap when the lens isn’t in use to prevent scratches and dust accumulation. Clean the lens surface gently with a microfiber cloth and lens cleaning solution.
Avoid harsh chemicals or abrasive materials. Store lenses in a dry, protected environment. Regularly check for loose elements or damage. Proper lens care ensures optimal image sharpness and longevity.

Downloading the Full Instruction Manual (PDF)
Access complete details! Canon provides a comprehensive PDF version of the Rebel T7/2000D instruction manual on their official website. Visit www.canon.com/icpd to download it directly.
This digital manual offers in-depth explanations of all camera functions, troubleshooting tips, and technical specifications. Having the PDF readily available ensures you have a detailed resource at your fingertips.
Related Posts

snuggle me washing instructions
Snuggle Me Washing Instructions: A Comprehensive Guide (Updated 02/05/2026) Snuggle…

follow these instructions to the letter crossword
The phrase "follow these instructions" appears frequently, often linked to…

infiniti pro conair instructions
Infiniti Pro Conair Instructions: A Comprehensive Guide Conair recalls roughly…