Dive into the world of Automatic Packet Reporting System (APRS) using a compact, affordable Raspberry Pi Zero W and Software Defined Radio (SDR) setup.
What is APRS?
APRS, or Automatic Packet Reporting System, is a digital communication protocol widely used by amateur radio operators for real-time tactical digital communications. It’s a network that transmits short data packets containing location information, weather reports, messages, and telemetry. Think of it as a digital bulletin board system overlaid onto a map. APRS utilizes the 144-148 MHz VHF band, and data is often visualized on mapping software like APRS.fi.
Originally designed for tracking vehicles and emergency communications, APRS has expanded to include a vast array of applications, from weather station data to tracking balloons and even wildlife. It’s a fantastic way to share information and connect with other radio enthusiasts.
What is SDR?
SDR, or Software Defined Radio, represents a revolutionary approach to radio communication. Traditionally, radios used dedicated hardware components for tasks like mixing, filtering, and demodulation. SDR shifts these functions to software, allowing a single piece of hardware to receive and decode a wide range of radio signals.
An SDR dongle, like the RTL-SDR, acts as the interface between the radio waves and your computer. It captures the raw radio frequency data, which is then processed by software on your Raspberry Pi. This flexibility makes SDR incredibly versatile and cost-effective for exploring various radio protocols, including APRS.
Why Raspberry Pi Zero W?
The Raspberry Pi Zero W is an ideal platform for a portable and low-power APRS SDR receiver. Its compact size and integrated Wi-Fi capabilities make it perfect for deployment in various locations, offering a convenient way to monitor APRS traffic. Despite its small form factor, the Zero W possesses sufficient processing power to handle the demands of SDR decoding.
Furthermore, the Raspberry Pi’s affordability lowers the barrier to entry for experimenting with APRS and SDR. Combined with a relatively inexpensive SDR dongle, it provides a complete solution for receiving and decoding APRS packets, making it accessible to hobbyists and enthusiasts alike.
Hardware Requirements
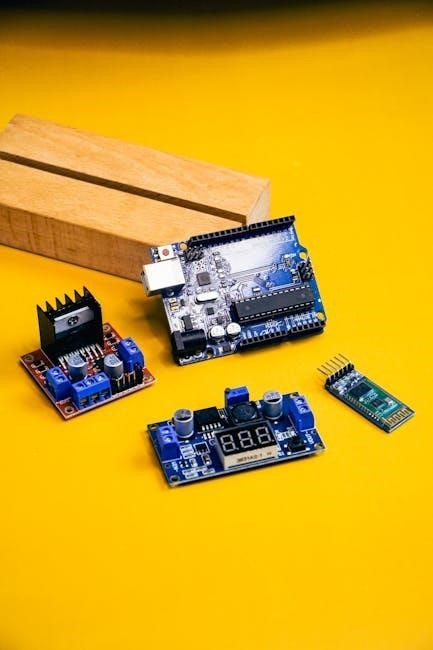
Essential components include a Raspberry Pi Zero W, an RTL-SDR dongle for signal reception, an antenna, and a reliable 5V power supply for operation.
Raspberry Pi Zero W
The Raspberry Pi Zero W is a cost-effective and compact single-board computer ideal for this project. Its small form factor and integrated Wi-Fi capabilities make it perfect for a portable APRS receiver. Ensure you have a compatible microSD card (8GB or larger recommended) for the operating system. A USB OTG adapter is also necessary to connect the SDR dongle, as the Zero W lacks standard USB ports. Consider a case to protect the board, and a heatsink might be beneficial for prolonged operation, especially during warmer temperatures. The Zero W’s low power consumption is a significant advantage for remote deployments.
SDR Dongle (RTL-SDR)
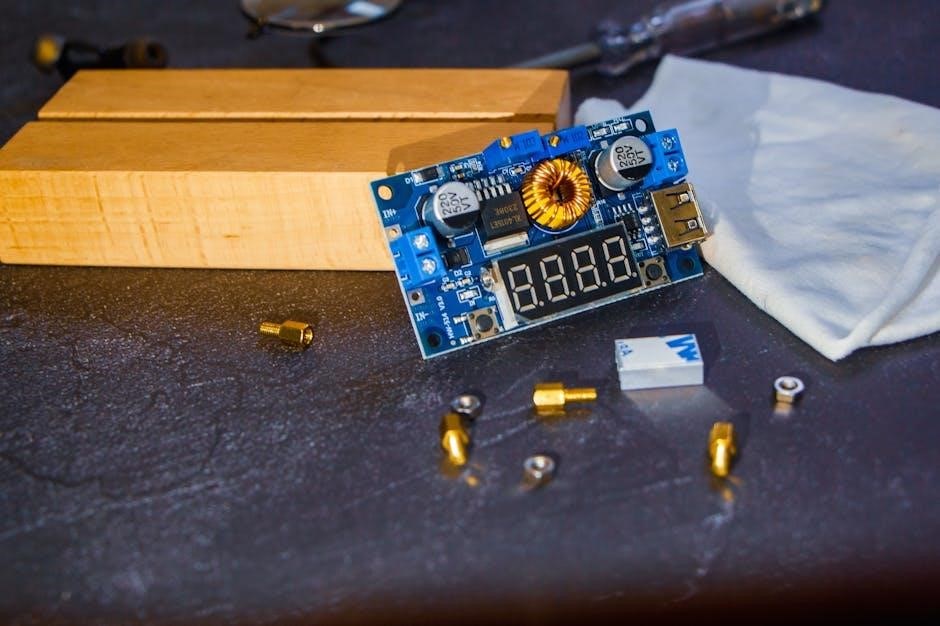
An RTL-SDR dongle is crucial for receiving APRS signals; these inexpensive USB devices transform your Raspberry Pi into a wideband receiver. Commonly, the RTL2832U-based dongles are used, readily available online. Ensure the dongle supports a frequency range including the APRS frequencies (typically 144.390 MHz). While many come with a basic antenna, upgrading to a more suitable antenna significantly improves reception. Consider a direct connection via a USB OTG adapter to the Raspberry Pi Zero W, avoiding USB hubs for optimal performance. Calibration, discussed later, is vital for accurate decoding.
Antenna
The antenna is a critical component, directly impacting APRS signal reception. A simple wire antenna can work, but a dedicated 144/430 MHz antenna is highly recommended for improved range and clarity. Vertical polarization is standard for APRS, so choose an antenna designed accordingly. Consider antenna placement – higher and unobstructed locations yield better results. Coaxial cable connects the antenna to the SDR dongle; use a low-loss cable to minimize signal attenuation. Experiment with different antenna types (e.g., dipole, J-pole) to find what performs best in your location. Proper antenna tuning is also essential.
Power Supply
Reliable power is crucial for stable operation of your Raspberry Pi Zero W APRS SDR receiver. The Pi Zero W requires a 5V power supply capable of delivering at least 2.5A, though 3A is recommended to accommodate the SDR dongle’s power draw. A high-quality USB power adapter is preferred over powering through a computer’s USB port, which may provide insufficient current. Ensure the power supply is properly grounded to minimize noise. Voltage fluctuations can cause instability, so a regulated power supply is ideal. Consider a USB power bank for portable operation, but verify its output specifications.

Software Installation & Configuration
Prepare your Raspberry Pi with the necessary software: an operating system, APRS decoding tools (Direwolf), and SDR utilities (rtl-sdr) for optimal performance.
Operating System Installation (Raspberry Pi OS)
Begin by installing Raspberry Pi OS, the recommended operating system, onto a microSD card. Download the latest version from the official Raspberry Pi website and utilize the Raspberry Pi Imager tool for a straightforward installation process.
Choose the “Raspberry Pi OS Lite” version for a minimal footprint, ideal for headless operation, or the desktop version if you prefer a graphical interface. After flashing the image, insert the microSD card into your Raspberry Pi Zero W.
Upon first boot, configure basic settings like Wi-Fi and SSH access for remote management. Ensure your system is updated with sudo apt update and sudo apt upgrade before proceeding with further software installations.

Installing APRS Software (direwolf)
Direwolf is a powerful APRS software package crucial for decoding and potentially transmitting APRS data. Install it using the command sudo apt install direwolf in your Raspberry Pi’s terminal.
This command fetches and installs Direwolf along with its dependencies from the Raspberry Pi’s software repositories. After installation, verify it by running direwolf -h, which should display the program’s help information.
Proper configuration of Direwolf is essential for optimal performance. We will cover this in a later section, focusing on settings tailored for SDR input and APRS decoding.
Installing SDR Software (rtl-sdr)
The rtl-sdr package provides the necessary tools to utilize your RTL-SDR dongle as a Software Defined Radio receiver. Begin the installation process by opening a terminal on your Raspberry Pi and executing the command sudo apt install rtl-sdr.
This command will download and install the rtl-sdr drivers and utilities, enabling your Raspberry Pi to communicate with the SDR dongle. Following installation, confirm successful setup by running rtl_sdr -h, which should display the program’s help menu.
Ensure your user has the appropriate permissions to access the SDR device; this is often handled automatically but may require adjustments.
Configuring Direwolf for APRS Decoding
To configure Direwolf for APRS decoding, you’ll need to edit the direwolf.conf file, typically located in /etc/direwolf. Begin by specifying your callsign using the CALLSIGN parameter. Next, define the serial port connected to your SDR with SERIAL, often /dev/ttyUSB0.
Crucially, set the SOUNDCARD parameter to the appropriate audio device. Configure the APRS frequency using FREQUENCY (e.g., 144.390 MHz); Adjust decoding parameters like BANDWIDTH and GAIN for optimal performance.
Finally, enable logging and network output for data display.
Network Configuration
Establish a stable network connection for your Raspberry Pi Zero W, utilizing a static IP address and configuring the firewall for seamless APRS data transmission.
Static IP Address Setup
Assigning a static IP address to your Raspberry Pi Zero W is crucial for reliable APRS operation, preventing IP address changes that could disrupt data flow. Begin by identifying your router’s IP address, subnet mask, and default gateway. Access the Raspberry Pi’s terminal and edit the dhcpcd.conf file using a text editor like nano. Add static IP configuration details, specifying the desired IP address, router address, and DNS servers.
Ensure the chosen IP address is outside the router’s DHCP range to avoid conflicts. Save the file and reboot the Raspberry Pi for the changes to take effect. Verify the static IP assignment using the ifconfig command in the terminal, confirming successful network configuration for consistent APRS functionality.
Firewall Configuration
Securing your Raspberry Pi Zero W with a properly configured firewall is essential, especially when connected to the internet for APRS data transmission and reception. Utilize ufw (Uncomplicated Firewall), a user-friendly firewall management tool. Begin by enabling ufw and setting default policies to deny incoming connections. Subsequently, allow necessary ports for APRS, such as port 14500 for Direwolf, and any other services you intend to run.
Carefully consider which ports to open, minimizing exposure to potential security risks. Regularly review and update firewall rules to maintain a secure APRS setup, protecting your Raspberry Pi and network from unauthorized access.
Connecting to the Internet
Establishing a stable internet connection is crucial for your Raspberry Pi Zero W APRS SDR to transmit and receive data, including accessing APRS.fi and other online resources. You can connect via Ethernet (if using an adapter) or, more commonly, through Wi-Fi. Ensure your Wi-Fi network is configured correctly within Raspberry Pi OS, providing the SSID and password.
Verify internet connectivity by pinging a reliable external server, like 8.8.8.8 (Google’s DNS). A successful ping confirms a working internet connection, enabling your APRS station to participate in the wider network and share your location and received packets.

SDR Configuration
Fine-tune your RTL-SDR dongle for optimal APRS reception by adjusting frequency, gain, and correcting potential PPM errors for accurate decoding.
Tuning to APRS Frequencies
APRS operates on specific VHF and UHF frequencies, varying by region. Commonly used frequencies include 144.390 MHz and 434.390 MHz. Utilize your SDR software (rtl-sdr) to input these frequencies precisely.
Start with a narrow bandwidth to reduce noise and improve signal clarity. Scan around these frequencies to identify active APRS beacons. Remember that frequency allocations differ geographically, so consult local APRS resources for the correct channels in your area.
Experiment with slight adjustments to the frequency to maximize signal strength and ensure successful packet decoding. Accurate tuning is crucial for reliable APRS reception.
Gain Adjustment
Proper gain adjustment is vital for optimal SDR performance. Start with a low gain setting to avoid overloading the receiver, which can cause distortion and decoding errors. Gradually increase the gain until you achieve a clear signal without excessive noise.
Monitor the signal strength indicator in your SDR software. Aim for a strong, clean signal, but avoid saturation. Excessive gain amplifies both signal and noise, potentially hindering decoding.
Experiment with different gain levels to find the sweet spot for your antenna and location.
Frequency Correction (PPM)
SDR dongles often exhibit slight frequency inaccuracies, measured in parts per million (PPM). Correcting this offset is crucial for accurate APRS decoding. Determine the PPM offset for your specific SDR dongle; online resources and testing with known frequency sources can help.
Within your SDR software (rtl-sdr), adjust the PPM value to align the received frequencies with the actual APRS frequencies (typically 144.390 MHz).
Fine-tune the PPM until you consistently decode APRS packets without frequency drift.
APRS Data Decoding & Display
Once decoded, APRS data can be visualized using online tools like APRS.fi or a locally hosted map, providing real-time tracking and information.
Using APRS.fi
APRS.fi is a popular web-based service for viewing APRS data, offering a user-friendly interface and extensive mapping capabilities. After successfully decoding APRS packets with your Raspberry Pi Zero W and Direwolf software, you can easily share this data with APRS.fi. Configure Direwolf to upload decoded packets to the APRS.fi server; this typically involves setting the server address and port within the Direwolf configuration file.
Once configured, your received APRS packets will appear on the APRS.fi map in real-time, allowing you to track stations, objects, and weather data. APRS.fi provides various filtering options to customize the displayed information and focus on specific types of APRS traffic. It’s a fantastic way to visualize your SDR’s reception and contribute to the global APRS network.
Using a Local APRS Map
For a self-contained APRS experience, consider running a local APRS map server on your Raspberry Pi Zero W. This eliminates reliance on internet connectivity and provides greater control over data presentation. Several software options are available, such as APRS2MAP, which displays decoded packets on a local web server accessible through a web browser.
Setting up a local map involves installing the necessary software, configuring it to receive data from Direwolf (often via a serial port or network socket), and then accessing the map through your browser using the Pi’s IP address. This approach is ideal for portable operation or situations with limited internet access, offering a private and responsive APRS viewing solution.
Decoding APRS Packets
Direwolf, the APRS software, is central to decoding received signals from the SDR. It processes the audio stream from rtl-sdr, identifies valid APRS packets, and extracts the contained information – position, telemetry, messages, and more. Proper configuration of Direwolf, including setting the correct serial port and audio input, is crucial for successful decoding.
Once configured, Direwolf outputs decoded packet data, which can then be directed to a local APRS map server or uploaded to the internet via a connection to a network. Monitoring Direwolf’s console output confirms successful packet decoding and reveals any potential issues with signal quality or configuration.

Troubleshooting
Common issues include a lack of signal, decoding errors, or network connectivity problems. Careful examination of hardware, software settings, and network configurations is key.
No Signal Received
If your Raspberry Pi Zero W isn’t receiving an APRS signal, several factors could be at play. First, verify the antenna connection to both the SDR dongle and ensure it’s properly deployed – a clear line of sight is often crucial. Double-check the SDR dongle itself is securely connected to the Raspberry Pi.
Next, confirm you’ve tuned to the correct APRS frequencies (typically 144.390 MHz for VHF). Adjust the gain settings within your SDR software; too low, and you won’t pick up signals, too high, and you’ll encounter noise. Finally, verify that APRS activity is actually occurring in your geographic area – use aprs.fi to check for nearby stations.
Decoding Errors
Encountering decoding errors with your Raspberry Pi Zero W APRS SDR setup indicates issues processing received packets. A common cause is incorrect frequency correction (PPM). Fine-tune this value in your SDR software to align with the actual frequency drift of your dongle. Signal strength plays a role; weak signals lead to corrupted data.
Ensure your gain settings aren’t excessively high, introducing noise that interferes with decoding. Verify Direwolf’s configuration file is correctly set up, particularly the serial port and baud rate. Check for software updates for both Direwolf and rtl-sdr, as bug fixes often improve decoding reliability.
Network Connectivity Issues
Troubleshooting network problems is crucial for APRS data transmission and access. First, confirm your Raspberry Pi Zero W has a stable internet connection, whether via Wi-Fi or Ethernet. Verify the static IP address is correctly configured and doesn’t conflict with other devices on your network. Check your firewall settings to ensure Direwolf and related software aren’t blocked from accessing the internet.
Ping external websites to test connectivity. If issues persist, reboot your router and Raspberry Pi. Ensure DNS settings are correct, allowing proper name resolution. A misconfigured network prevents uploading decoded packets to APRS.fi or accessing remote maps.

Advanced Configuration
Expand your APRS capabilities by establishing a digipeater, integrating a GPS module for location reporting, and enabling secure remote data access.
Setting up a Digipeater
Transform your Raspberry Pi Zero W APRS SDR receiver into a valuable network node by configuring it as a digipeater. This involves enabling Direwolf to re-transmit APRS packets it receives, extending the range of the APRS network for others. Carefully consider your location and antenna setup for optimal performance. Configure Direwolf’s digipeater settings, specifying the callsign and appropriate paths.
Ensure your digipeater adheres to local APRS operating guidelines and doesn’t interfere with existing infrastructure. Monitor performance regularly and adjust settings as needed. A well-configured digipeater significantly enhances APRS coverage and connectivity within your region, contributing to a more robust and reliable network for all users.
Using a GPS Module
Enhance your APRS station’s capabilities by integrating a GPS module with your Raspberry Pi Zero W. This allows your station to transmit its precise location alongside APRS packets, crucial for mobile tracking and position reporting. Connect a compatible GPS module to the Pi’s serial port and configure Direwolf to access the GPS data stream.
Proper configuration ensures accurate location information is embedded within transmitted packets. Regularly verify GPS lock and data integrity. A GPS-enabled station transforms from a passive receiver to an active participant, providing valuable positional data to the APRS network and enabling advanced tracking applications.
Remote Access to APRS Data
Access your Raspberry Pi Zero W APRS data from anywhere with a secure remote access solution. Configure SSH for command-line access, enabling remote monitoring and control of Direwolf and the SDR. Alternatively, set up a web-based interface using tools like Flask or Node-RED to visualize decoded APRS packets and station status through a browser.
Prioritize security by using strong passwords, key-based authentication, and a firewall. Remote access allows convenient monitoring of APRS activity, troubleshooting, and software updates without physical access to the Pi. This expands the utility of your station beyond local monitoring capabilities.

Resources & Further Learning
Explore APRS, Raspberry Pi, and SDR through dedicated websites, active forums, and comprehensive documentation for continued learning and project expansion.
APRS Websites & Forums
For a wealth of information and community support regarding APRS, several online resources are invaluable. APRS.fi (aprs.fi) is a central hub for real-time APRS data display and analysis, offering interactive maps and packet information.
The APRS World website (aprs-world.com) provides detailed documentation, specifications, and resources for understanding the APRS protocol. Online forums, such as those found on Reddit (search for APRS or Raspberry Pi subreddits) and dedicated amateur radio forums, offer opportunities to connect with experienced users, ask questions, and share project ideas.
These communities are excellent for troubleshooting issues and discovering new applications for your Raspberry Pi Zero W APRS SDR setup;
Raspberry Pi Documentation
The official Raspberry Pi documentation website (raspberrypi.com/documentation) is an essential resource for all things Raspberry Pi. It provides comprehensive guides on operating system installation, configuration, and software development.
Specifically, explore the sections on Raspberry Pi OS (formerly Raspbian) for detailed instructions on setting up and managing your operating system. The documentation also covers hardware specifications, pinout diagrams, and troubleshooting tips.
For advanced users, the kernel documentation offers insights into customizing the Linux kernel for optimal performance. Utilizing these resources will greatly aid in configuring your Raspberry Pi Zero W for APRS SDR reception.
SDR Tutorials
Numerous online tutorials cater specifically to Software Defined Radio (SDR) and the RTL-SDR dongle, crucial components of this project. Websites like RTL-SDR.com offer extensive guides on SDR basics, driver installation, and software configuration.
Focus on tutorials covering the installation and usage of rtl-sdr, the command-line tool used to interact with your SDR dongle. Understanding gain adjustment, frequency correction (PPM), and signal processing techniques are vital for successful APRS decoding.
YouTube channels dedicated to SDR often provide visual demonstrations and step-by-step instructions, simplifying complex concepts.
Related Posts

husqvarna yth18542 parts manual
Husqvarna YTH18542 Parts Manual: A Comprehensive Guide This manual details…

fluke 753 calibration manual
Fluke 753 Calibration Manual: A Comprehensive Overview (Updated 02/16/2026) Fluke…

black+decker portable air conditioner manual
Black+Decker Portable Air Conditioner Manual: Article Plan This comprehensive guide…